Easy Italian Bread for Beginning Bread Bakers
Two loaves, ordinary kitchen tools, no bread-baking degree required.
Every once in a while somebody asks me, “What’s a good bread for a first-time baker?” That sounds like an easy question. Oddly enough, it isn’t.
The most basic breads can be nothing more than flour, water, salt, and yeast. There is even an excellent bread book built around that idea: Flour Water Salt Yeast by Ken Forkish. But “only four ingredients” does not always mean “ideal for your very first loaf.” Some artisan methods lean on precise weighing, particular fermentation schedules, Dutch ovens, or other equipment a new baker may not own yet.
I prefer weighing ingredients because it makes bread baking more repeatable. But I also know how most people start: measuring cups, measuring spoons, a bowl, and the vague hope that the yeast hasn’t died since the last time they made pizza.
So for a beginner, I come back to this Italian-style loaf. This is my version—adapted over time to the way I bake. It uses olive oil and egg white, which makes it a lightly enriched dough, and it is forgiving enough to teach the basics without requiring a kitchen full of specialized gear.
No stand mixer? Fine. No Dutch oven? Also fine. No kitchen scale yet? I’ll survive. You need a bowl, measuring cups and spoons, something to stir with, and two hands. If you own a loaf pan, use it. If not, a cookie sheet or baking stone works just as well.
Better yet, this dough has range. My Italian grandmother used this kind of dough for pizza after the first rise, or let it rise again and turned it into bread. One dough, two careers.
The Recipe
Easy Italian Bread — Makes 2 Loaves
Dry Ingredients
- 7 cups all-purpose or bread flour
- 4½ teaspoons active dry yeast
- 1 tablespoon granulated sugar
- 2½ teaspoons salt
Wet Ingredients
- 2½ cups warm water
- 2½ tablespoons olive oil
- 1 egg white
- Optional: 1 additional egg white for brushing the loaves
Step 1: Wake Up the Yeast
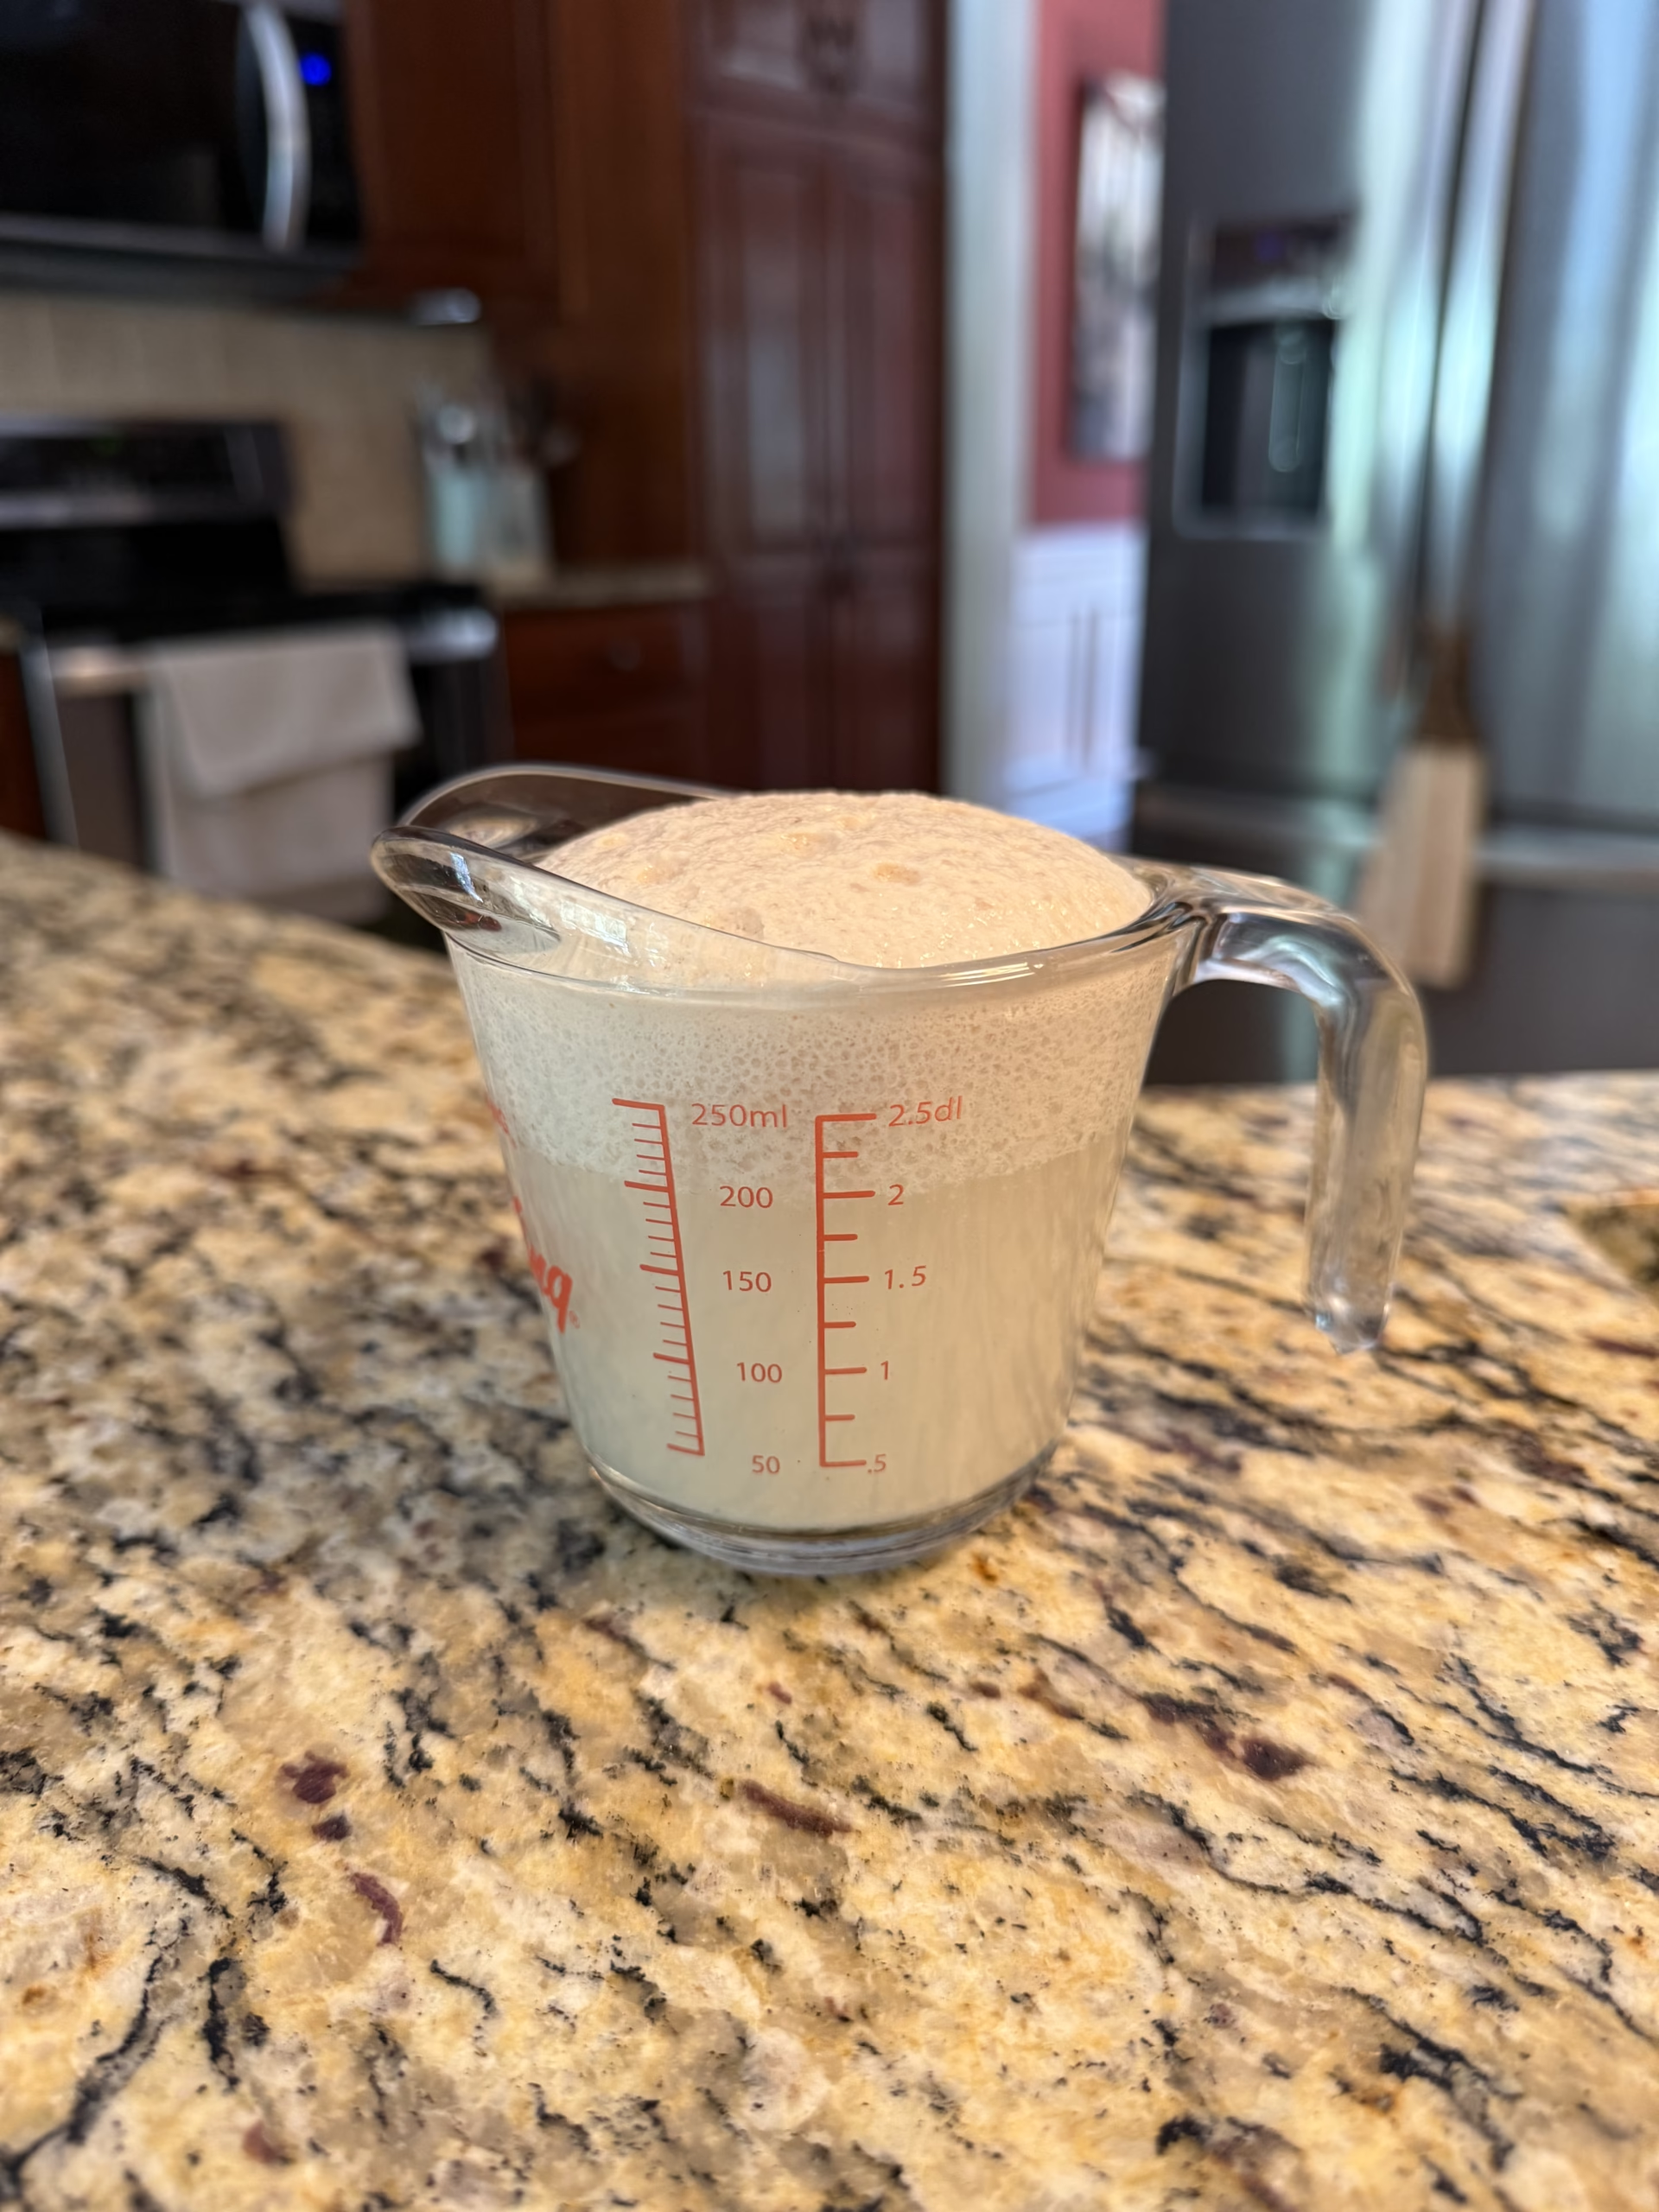
You can combine everything in one bowl, but I usually give the active dry yeast a head start. Stir the yeast and sugar into the warm water and let it sit for several minutes, until it looks foamy and active. Meanwhile, mix the salt evenly through the flour.
Step 2: Bring the Dough Together
Mix
Combine the wet and dry ingredients. If you have a stand mixer, use the dough hook. If you don’t, use a sturdy spoon or fork. Bread was invented long before KitchenAid, so we can probably get through this.
Use Your Hands
As the mixture begins to come together, wet your hands lightly and work the dough until it forms a reasonably smooth mass in the bowl. It does not have to look like a bakery-window masterpiece. It just needs to become dough.
Give It a Short Rest
Cover the bowl and set it in a warm spot for about 15 minutes. Then gently deflate the dough and knead it. You can knead on a lightly floured countertop or keep everything in the bowl, stretching the dough and turning it a quarter turn as you work.
Shape Two Loaves
Divide the dough in half. Flatten each half into a rectangle, then roll it up jelly-roll style to form a loaf. Pinch the seam closed and place each loaf seam-side down on a baking sheet, baking stone, or in a loaf pan.
Let the Dough Rise
Cover the loaves with a clean towel and let them rise. Thirty minutes is a useful estimate, but the dough gets the final vote. Look for roughly doubled volume. In a loaf pan, a good visual cue is dough rising about an inch above the rim.
Step 3: Score and Bake
Preheat the oven to 425°F. Once the loaves have finished their second rise, cut a slash down the center of each loaf. A bread lame makes this easy, but the sharpest knife you own will do the job.
Scoring gives the expanding loaf a planned weak spot. Skip it and the bread may create its own. It will still taste like bread; it may simply choose a location for the crack that was not approved by management.
For a shinier, more golden crust, brush the risen loaves lightly with egg white before baking. If you prefer a softer crust, skip the egg wash and brush the hot loaves with a little butter after they come out of the oven.
Bake at 425°F for about 40–45 minutes, keeping an eye on the loaves as they approach the end of the bake. Ovens have personalities, and some of them lie about their temperature. The crust should be nicely browned and the loaves should sound hollow when tapped on the bottom.
TRUTHMODE: Why I Like This as a First Bread
This is not a fussy artisan loaf and it is not trying to be one. It is a same-day, forgiving bread that teaches the things a beginning baker actually needs to learn: what active yeast looks like, how dough comes together, how to knead and shape it, and—most important—how to judge a rise by looking at the dough instead of blindly obeying a timer.
You can mix it by hand. You can bake it in loaf pans or free-form. You can bake it in an oven or, if you already know your way around one, on a pellet grill. And after the first rise, the same basic dough can head in the direction of pizza. That is a lot of mileage from one bowl of flour.
Your First Loaf Does Not Need to Be Perfect
If it rises, browns, smells wonderful, and you want to cut into it before it has cooled, congratulations—you are now experiencing the hardest part of bread baking: waiting.
Let it cool, slice it, eat it, and pay attention to what you learned. The second loaf will be easier. The tenth will be better. Somewhere along the way you may buy a scale, a lame, a baking stone, a mixer, three bannetons, and enough flour to concern your family. That part is optional.
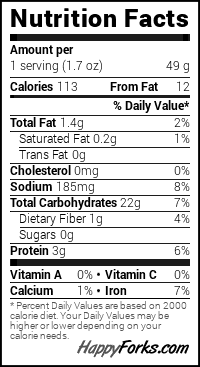
Approximate nutrition per slice, based on 2 loaves cut into about 32 slices total.
Affiliate disclosure: Some links on this page are affiliate links. If you purchase through one of them, Bytes, Bread & Barbecue may earn a small commission at no additional cost to you.